
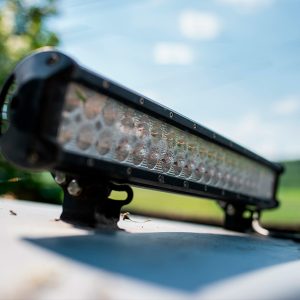
An LED light bar is a must if you’re going off-roading, providing superior illumination in the dark when you’re m
iles away from streetlights and other vehicles. The good news is that installing an LED light bar is a relatively simple process; in fact, you can complete the project yourself from your own garage. Below, we’ll go over the necessary steps for installing an LED light bar with a relay and switch.
What is a relay?
You may be wondering what a relay is and you need to install one with your LED light bar. A relay is an electrical switch that allows the low-current switch circuit to control the flow of electricity from a high-current circuit. Without a relay, your control switch will need to be able to handle the full current of the LEDs you install, which likely won’t be possible above 30W. Then, you may end up overheating the switch, melting the wires and reducing the current that travels to your lights, making them dimmer. Fortunately,
i
Step 1: Disable Terminals of Shorter Output Wiresnstalling an LED light bar with a relay is easy:
If you are only using one set of terminals, you need to wrap each set in electric tape to ensure the points don’t touch. Wrap the black and white wires away from each other.
Step 2: Connect Other Terminals to LED Light Bar
Connect the white terminal wire to the positive red wire, and connect the black wire to the negative black wire. Then, secure these connections with electric tape.
Step 3: Connect to Car Battery
Con
nect the positive red wire to the car battery positive, and the negative black relay wire to the car battery negative. This way, if the LED light bar short circuits, the fuse will blow, which will prevent further damage.
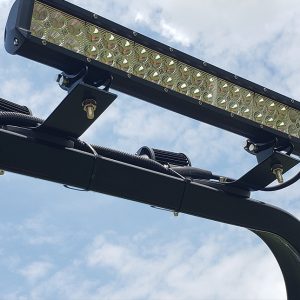
Step 4: Apply Button Switch to Driver Side
Now, you need to route the button switch to the interior of the driver side so you can control the LED light bar while behind the wheel. Draw the switch portion of the wiring from the passenger side to the driver side, and insert the switch from the engine bay into the interior.
Step 5: Protect Car Battery
It’s important to wire your LED light bar in a way that protects your car battery from being drained if you forget to shut it off. To do this, merge the red trigger wire to a headlight or taillight positive wire, and merge the black wire to a ground. Your car likely turns off its headlights automatically when it is shut off, which will also shut off the light bar.
Step 6: Test Your New LED Light Bar
Now that you have completed all the necessary wiring for your LED light bar, it’s time to test it and make sure everything is working properly. Then, you’re all done and ready for any off-roading adventure!